Send SMS
This tutorial demonstrates how to send SMS with RingCentral C# SDK.
This tutorial is based on the tutorial Authentication. If you didn't follow that tutorial, you can download its source code and start our experiment right here.
Requirements
In order to complete this tutorial. You need two RingCentral accounts. One for sending SMS, the other for receiving SMS. You should also install the RingCentral app, and logon with the account which is for receiving message.
If you only have one account, or you don't want to install the RingCentral app, you can still continue to experiment this tutorial. But you won't be able to tell whether the receiver has received the message.
Experiment
Launch Xamarin Studio

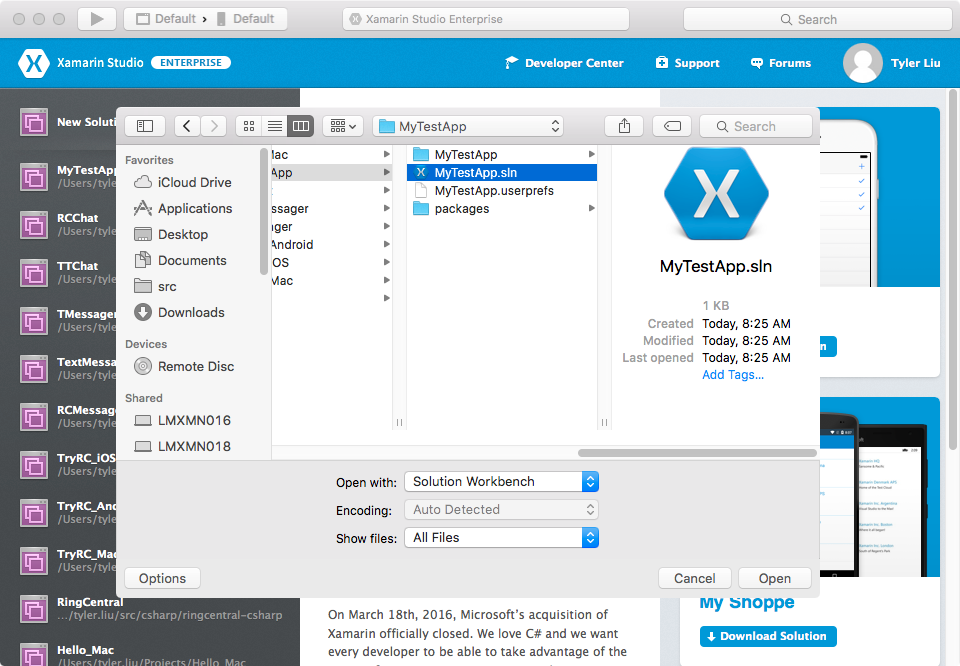
Press CMD - O to open the MyTestApp solution created in Authentication tutorial.
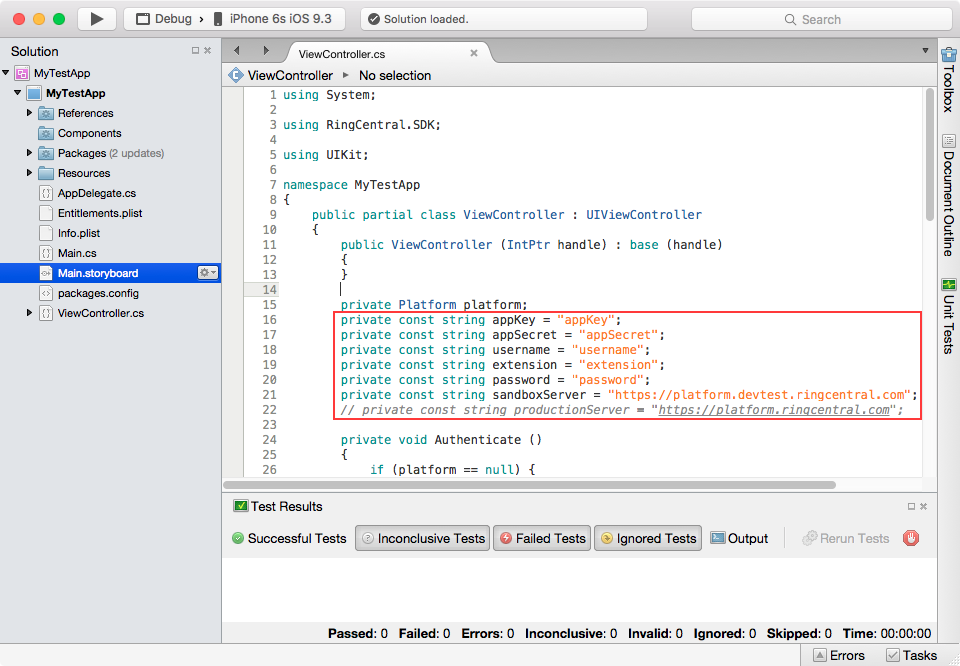
First of all, make sure to replace the following with real credentials
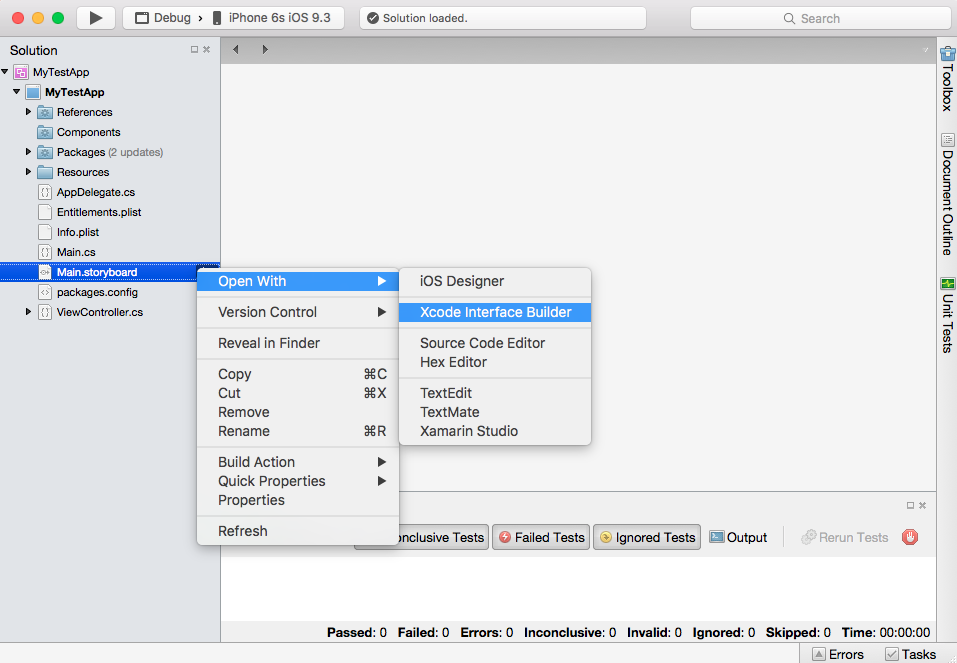
In the last tutorial, when the app is up and running, what we get is just a blank window, which is not cool. In this tutorial, we are going to create some UI elements. Select "Main.storyboard", right click and choose "Open With -> XCode Interface Builder"
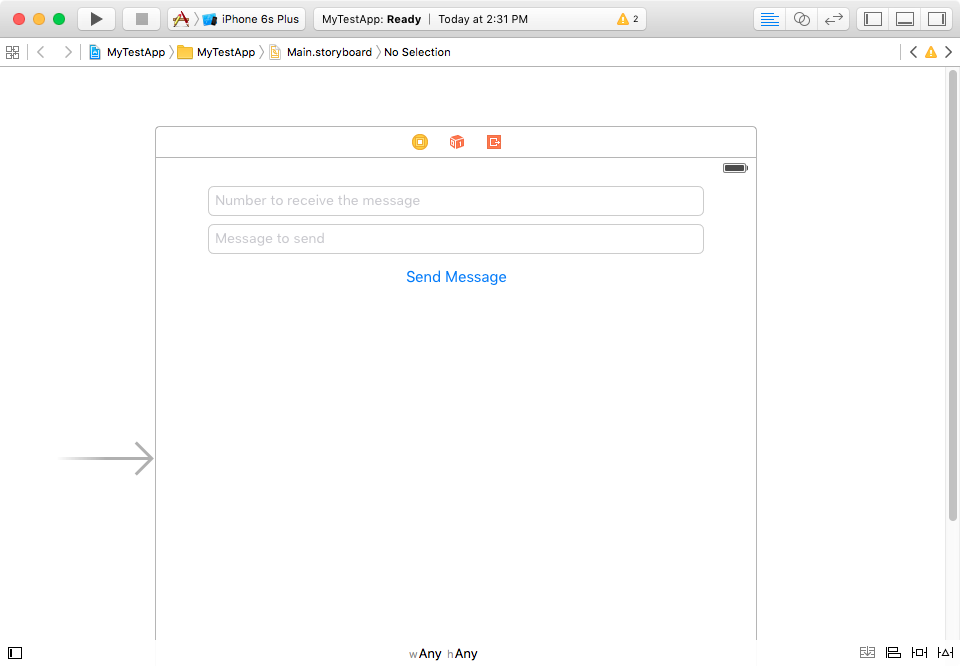
Create the following UI in XCode Interface Builder.
How to build UI with XCode Interface Builder is out of the scope of this tutorial. There are some great videos about XCode Interface Builder from Youtube.
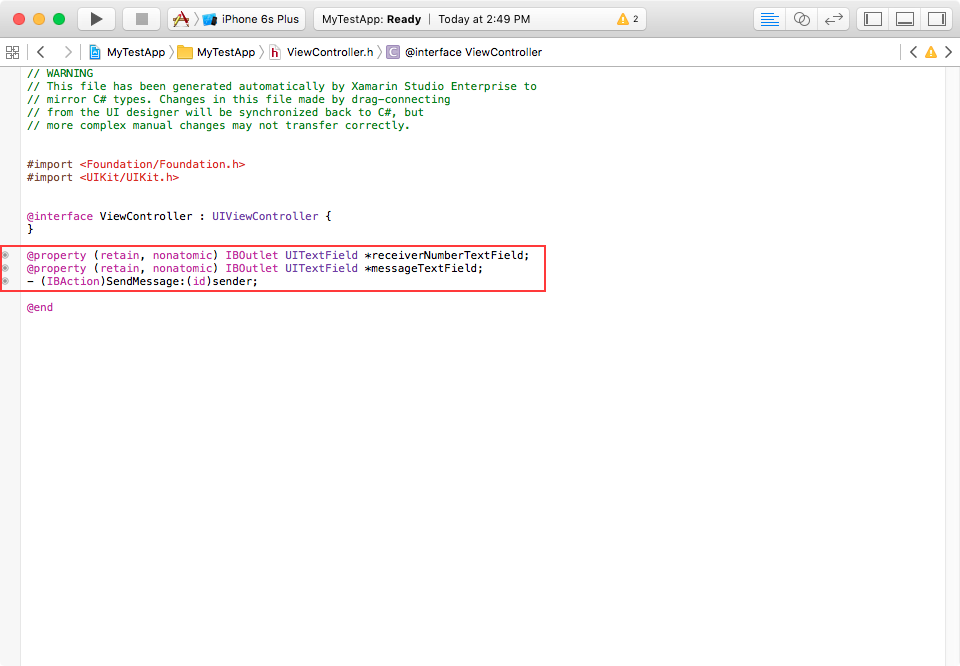
Still in XCode Interface Builder, Create outlets for the two text fields, create an action for the button. Please name the two outlets as receiverNumberTextField and messageTextField. Please name the action as SendMessage. The resulting Objective-C code should be like following:
How to create outlets and actions in XCode Interface Builder is out of the scope of this tutorial. There are some wonderful videos from Youtube.
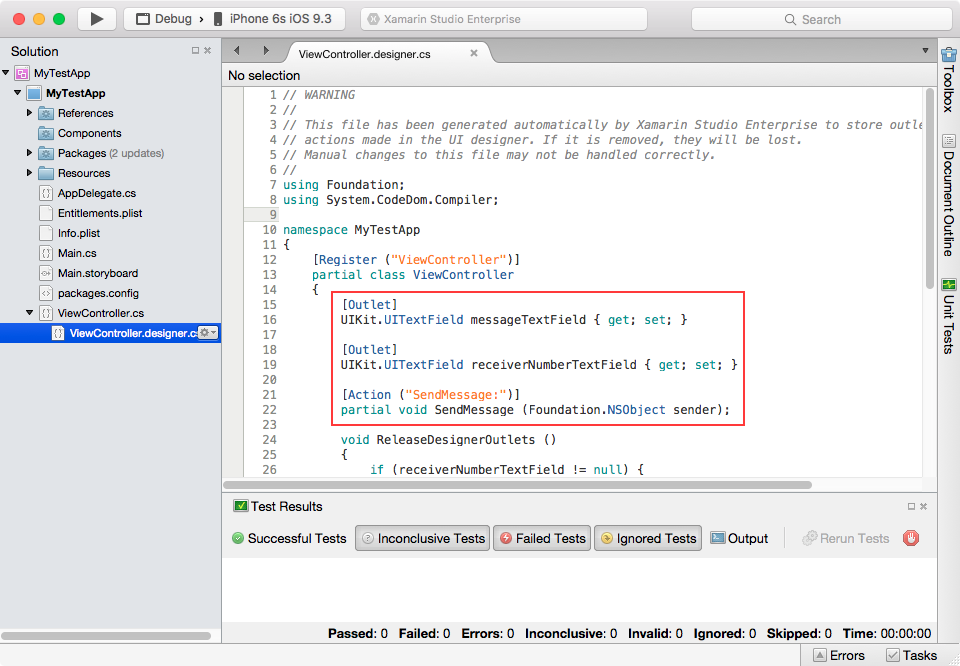
Now go back to Xamarin Studio. And review the source code of ViewController.designer.cs. There should be some code automatically generated.
Let's edit ViewController.cs, add the following code:
partial void SendMessage (Foundation.NSObject sender)
{
    Console.WriteLine("Button clicked");
}
Now CMD - Return to run the app. In the iPhone simulator, click the "Send Message" button mutiple times. Check the "Application Output" window for something like what is shown in the following screenshot.

Now we are sure that button are connected correctly to the action method. Let's move on to send SMS!
Update SendMessage action method, replace its content with:
var requestBody = new Dictionary<string, dynamic> {
  { "text", messageTextField.Text },
  { "from", new Dictionary<string, string>{ { "phoneNumber", username } } }, {
    "to",
    new List<Dictionary<string, string>> { new Dictionary<string, string> { {
          "phoneNumber",
          receiverNumberTextField.Text
        }
      }
    }
  }
};
var jsonBody = Newtonsoft.Json.JsonConvert.SerializeObject (requestBody);
var request = new RingCentral.SDK.Http.Request ("/restapi/v1.0/account/~/extension/~/sms", jsonBody);
var response = platform.Post (request);
Console.WriteLine ("Sms sent, status code is: " + response.GetStatus ());
The code needs a little explanation.
var requestBody = new Dictionary<string, dynamic> {
  { "text", messageTextField.Text },
  { "from", new Dictionary<string, string>{ { "phoneNumber", username } } }, {
    "to",
    new List<Dictionary<string, string>> { new Dictionary<string, string> { {
          "phoneNumber",
          receiverNumberTextField.Text
        }
      }
    }
  }
};
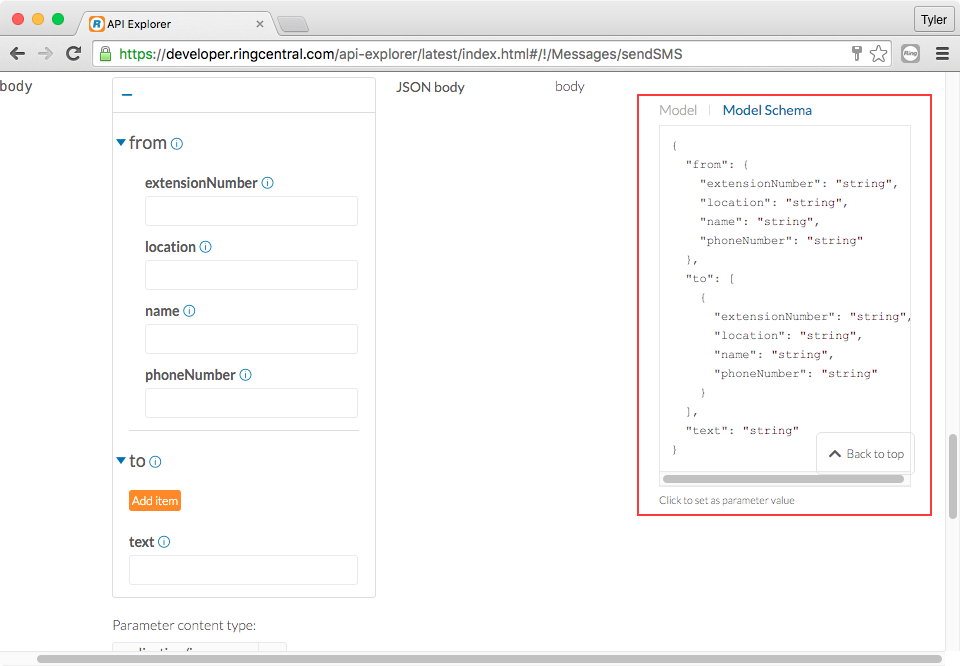
Statement above creates the request body. I know you might be wondering: what's the required data structure for request body? Where is the specification?
The specification could be found in the API Explorer. open the web page, click "Messages" followed by click "Create SMS Message". You will find the model schema for the JSON body right there:
var jsonBody = Newtonsoft.Json.JsonConvert.SerializeObject (requestBody);
Statement above converts the C# object into json string. This is because the api server only accepts json data as request body.
var request = new RingCentral.SDK.Http.Request ("/restapi/v1.0/account/~/extension/~/sms", jsonBody);
var response = platform.Post (request);
Console.WriteLine ("Sms sent, status code is: " + response.GetStatus ());
Code above are quite self-explanatory: the first statement creates the request object, the second statement posts the request to server and get the response object, the final statement just prints the status code.
OK, everything is ready now, let's run the app!
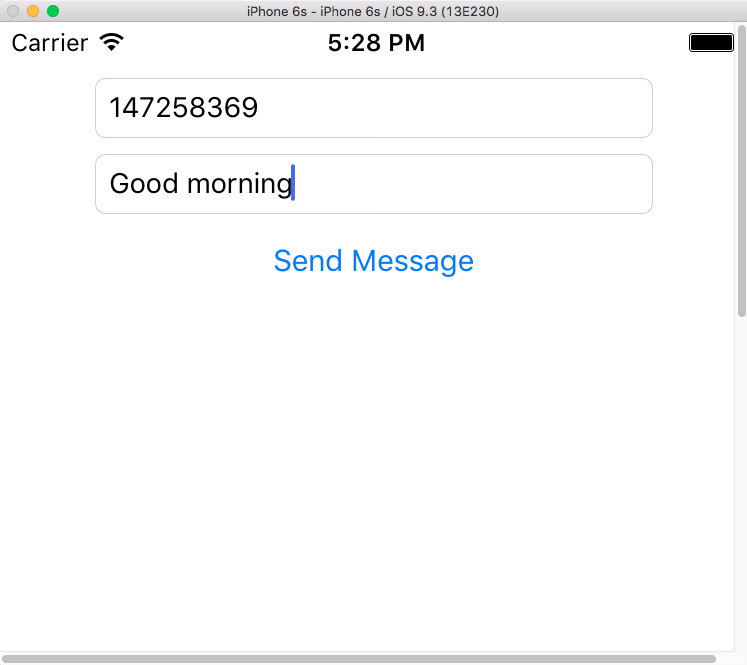
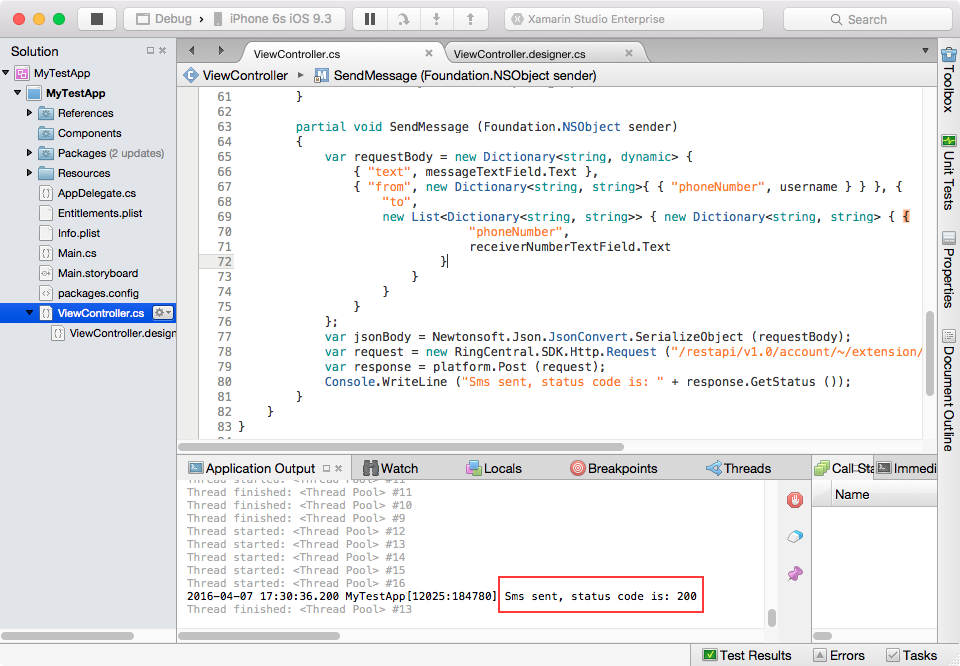
Enter the phone number, enter the greetings, press the "Send Message" button. The go back to Xamarin Studio and look at the "Application Output" windows for the text "Sms sent, status code is: 200".
If you know the receiver's account credentials, it's time to logon that account with RingCentral app and confirm the message has arrived at its destination.
It's done, cheers!
Source code for this tutorial is available.
What's next?
You might also be interested in how to receive messages in the app. If so, please continue to read Receive Messages tutorial.